
The AML Dashboard is a web-based tool that allows users to interact with the AML framework. This tutorial guides you through the process of managing AML-IP Agent Nodes—creating, stopping, and deleting them—using the AML Dashboard. It also demonstrates how to perform distributed training and inference over WANs and fetch a pretrained model from a computer situated in another LAN to continue training your model.
Prerequisites
To get started, ensure that you have installed the AML Dashboard using one of the following methods:
For more information, check the AML Dashboard Interfaces and AML Dashboard Usage sections.
Running the demo
To run the necessary components for managing AML-IP nodes using the AML Dashboard, follow these steps:
1. Start the backend server
To begin, you need to launch the backend server:
- Navigate to the backend directory.
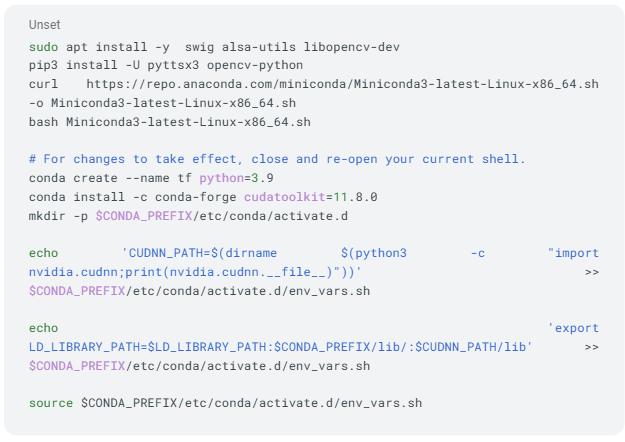
- Load the AML-IP environment.

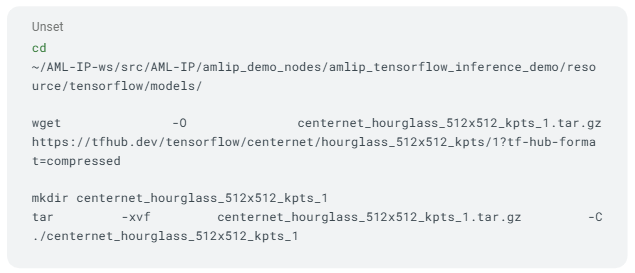
- Start the server:
2. Start the AML Dashboard
Once the backend server is running, start the AML Dashboard frontend:
- Navigate to the frontend/aml_dashboard directory.

- Start the AML Dashboard:

3. Access the dashboard at http://localhost:5173/
Manage Agent Nodes
Create an Agent Node
Agent Nodes rely on the eProsima DDS Router, a tool developed by eProsima to connect distributed DDS networks. This enables DDS entities such as publishers and subscribers in separate geographic locations to communicate seamlessly over WANs as though they are on the same network.
Agent Nodes act as bridges, linking a local node or AML-IP cluster with the broader network in WANs. They centralize WAN discovery and communication.

To create an Agent Node (Client, Server or Repeater), follow these steps:
- Go to the AML-IP tab in the AML Dashboard.
- Navigate to the Agent Node tab.
- Specify the necessary parameters for the Agent Node creation.
Stop and Delete an Agent Node
To stop an Agent Node, follow these steps:
- Go to the AML-IP tab in the AML Dashboard.
- Navigate to the Agent Node tab.
- Click on the Delete button under the Delete Agent Node section.
- Once deleted, the Agent Node Status will update to Deleted!
For more guidance, refer to the accompanying video:
Connect Over WAN
To connect nodes over WAN:
- Create a Client Node on the user’s side.
- Create a Server Node on the remote network.
Demo
The following video demonstrates the process of:
- Connecting nodes over WAN.
- Performing distributed training.
Conclusion
With this tutorial, you can efficiently manage distributed nodes and leverage the full potential of the AML framework for WAN-based training and inference.
For more details on the AML Dashboard and its functionalities, explore the AML-Tools Documentation.
By
MORE INFORMATION:
To learn more about AML, click here.
For any questions about ALMA, please contact







 This project has received funding from the European Union’s Horizon 2020 research and innovation programme under grant agreement No 952091.